Showing posts with label workshop. Show all posts

Wednesday, August 10, 2016

Concrete Sculpting with Armature Workshop

Earlier this summer, I wanted to apply for a scholarship that would provide funds for professional development, so I was searching online for a potential workshop.  One of the skills I would like to build into my repertoire is creating 3-D forms.  I'm inspired by the work of Nikki de St. Phalle and Jolino Bessera, among others.
 Queen Califia Park in San Diego
I happened upon the website of Katerina Pinosova, a surrealist artist who works in a variety of mediums, including concrete.  There was information about workshop instruction, so I sent her an email.
Sculpture by Katerina Pinosova

I learned that Katerina currently resides in Austin, TX, but that she is considering moving back to the Czech Republic very soon.  I decided to take a leap of faith and schedule a workshop with her while she was still in the U.S.

So, last week, I flew to Austin.  I had to rent a car and drive to an outlying area called "Lakeway" where I had booked a room in an Airbnb less than 2 miles from the workshop location (Katerina's house.)

Katerina is tall and lean with large, bright green eyes and a beautiful smile.  She had everything prepared in a carport, and we got to work right away.  On the first day, she showed me how to build an armature from supplies that are easily found at a hardware store.  We cut thick fencing apart, bent the rods into a basic shape, and used tie-rod to hold it to itself.  Then we layered chicken wire onto the form, securing it with tie-wire, and winding wire throughout the form to add extra structure.  Katerina seemed to be able to go for hours without tiring, but my right hand was aching by the end of the day, no longer functional.  We decided to let my hands rest and finish in the morning.
My armature.
So we started early again on the second day.  Within a couple of hours, my armature was completed.  Honestly, I had expected to be more of a natural than I was.  This was my 4th concrete sculpture workshop, after all, and I thought my chicken shape would be more well-formed.  But, the technique was much harder than I expected, and the chicken was much more rudimentary than I had intended.  By then, I was melting in the heat and my hands were throbbing, and I didn't much care how my chicken turned out as long as I gleaned the information to try again at home.

The next stage was applying a thick cement mix, just to create a basic shape.  In the heat, we had to mix small batches and work fast, and sweat was pouring off of both of us.  When I took off my gloves the first time, I was shocked to see water pour out, and my fingers shriveled like morel mushrooms.
First layer.
We took a lunch break while the mud hardened, only for 2 hours.  When I got back to Katerina's house, we resumed mixing cement, this time with finer sand mixed wetter, and applied two more layers to create a smooth crust.  We mixed so many batches of cement that we wore right through the bottom of the mixing bucket!  By the end of the day, I was completely exhausted.
This is just as I began to apply the final layer of cement.
On the final day, we started a bit later because there was only one layer left to apply.  This time, we mixed white cement with fine sand, and had to take extra care to smooth it consistently.  Katerina showed me how to add fine details. When I added eyes, my chicken suddenly came to life, and I was thrilled!  I had made a chicken planter because I knew I couldn't take my project home, and the folks I stayed with had a small flock of chickens and a little garden in their backyard.  The planter will go to their house after it cures for a month.
Add caption


Katerina on the left, me on the right, and one of her sculptures center.
I'll write more about the fantastic adventures that followed during the rest of my trip in separate blogs.  Stay posted!

Friday, March 20, 2015

Coming April 11 & 12: Beyond Basics Mosaic Workshop in Olympia, WA

Looking at the calendar, I just realized how quickly the next workshop is coming up!  This will be my first time teaching this class; "Beyond Basics," which will address some of the steps a beginner mosaic artist can take to get to the next level.  I've noticed that most mosaic workshops are either project based (make a mirror frame, a flower pot, a stepping stone) or are intermediate/advanced technique-based classes that go deeply into one specific method that the instructor has mastered.  I recently took a short version of Kelley Knickerbocker's "Fundamento" workshop, which was fantastic for taking andamento to new, mind-boggling dimensions.  And I just took a workshop in Philadelphia from Lynn Takata on building 3-D substrates for mosaic, which builds on one that I took from Passiflora Mosaics near Santa Barbara last spring, on building sculptures with a styrofoam base.  Each of these is very specific, and only useful if you have some experience under your belt to put it into context.

Over the past 5 years, I finally accepted that there are some mosaic fundamentals that will go a long way toward improving the composition and flow of a mosaic design.  Reluctantly, I wrapped my brain around these concepts, and after a few years, I realized how much my work had changed.  And I like it.  To emphasize and understand my growth, I re-made one of my favorite designs with new information.
I think this was 2009.  (Note: I had been working in mosaic for 9 years!)
This was 2014.
I still have much to learn, but I think this demonstrates a shift from beginner to intermediate, and I plan to break down the information I've gained as well as I can for this class.

There is so much a mosaic artist learns through trial and error, and from spending the time and money to take workshops from other experienced instructors, that I'll be covering the essentials in this 2-day class, but it won't be possible to convey my 15 years of experience within 10-12 hours.  I'm going to do my best, including an overview of the wide variety of applications, materials, substrates, adhesives and setting techniques used in mosaic art on Saturday.  On Sunday, I plan to get into some of the terminology specific to mosaic, and to delve into types and uses of andamento.  Students will have two small substrates of different kinds, with some materials samples and adhesives, and will be invited to play with each of these to get a sense of them.  You may choose to make a small project, or just use the time to gain information for future use.  Bring a notebook and pencil to take notes and sketch ideas.  When we get into andamento, this will be especially helpful.

I know I already have some absolute beginners signed up for the Olympia class, so I will try to start at that point, but I planned this originally for those crafters who have been playing around with mosaic, but would like some tools for taking their work to the next level.  I hope I can meet the needs of all participants, and I'll make every effort.

Details can be found at the Arbutus website: http://www.arbutusfolkschool.org/current-classes/
Scroll down to April  11/12.  Then on the upper left is a button for "register for classes."
I look forward to working with some of you!

Tuesday, January 14, 2014

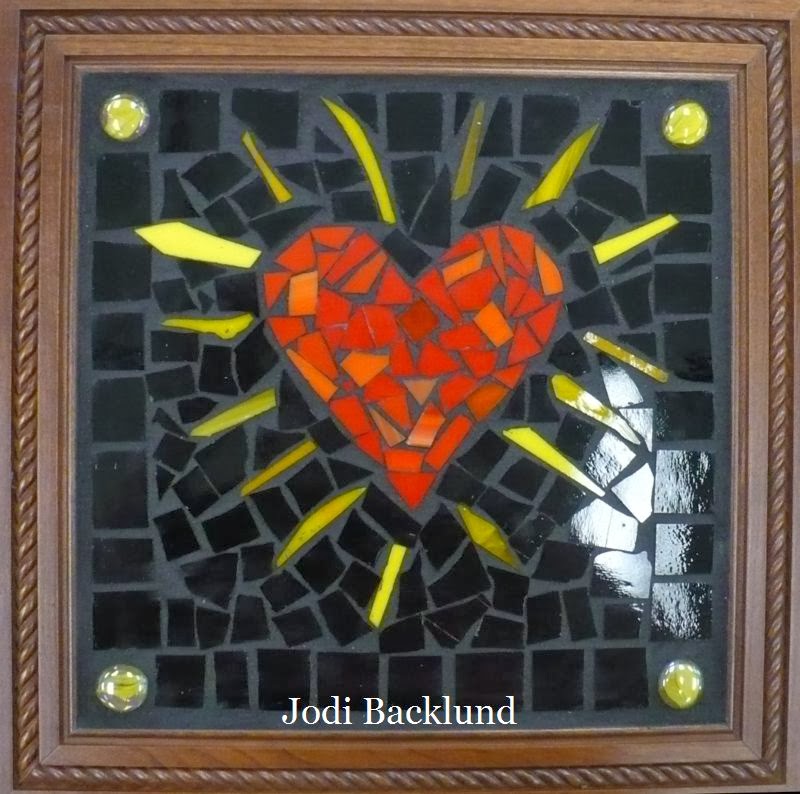
Broken Heart Mosaic Workshop in Olympia, WA

Many years ago, I offered one of my first mosaic workshops through a little shop called Whirligig in Downtown Olympia.  The owner promoted the class for me, and she titled it "Broken Heart Mosaic Workshop" because it was right before Valentine's Day and I was setting up a small heart-themed project for students.

I think I had four students, and all had broken hearts.  They spent the day creating heart mosaics from broken shards, pouring out their stories to each other, discussing relationships and processing loss and grief.  I didn't plan it that way.  It just happened, and it was great.

This is not student work.  I made it.
I was never particularly interested in the heart symbol.  It seemed too "cute" and girly to me.  But it was around that time that I started to change my relationship with the Heart.  As a symbol of love and hope, the heart shape may be something we need more of.  Laurel True created a mosaic heart that is particularly inspiring to me: http://truemosaics.com/love-and-truth

After that, I tried to teach the Broken Heart class each year, usually coinciding with Super Bowl Sunday.  Those classes filled up, and were always fun and intimate.  I had found a great stained glass studio that hosted my classes, Hexen Glass, but they closed their public studio a few years ago.  Since then, I haven't taught much, and not locally.  But I recently discovered a new folk art school in Olympia.  I like what they are doing, and I miss the Broken Heart workshop, so I'm finally offering it again this year.
This is a student project.  I love this one.

Here is the description on my website, with a link to registration information: http://jkmosaic.com/broken-heart-mosaic-workshop/

The class will be Sunday, Feb. 9th.  The project can be a gift for someone special or a keepsake for yourself.  I'm hoping for an enthusiastic response!