Showing posts with label instruction. Show all posts

Tuesday, October 12, 2021

The Cost of Learning (and Teaching) Mosaic

 While brainstorming a new workshop idea on social media, I received a request to please price it affordably. There was a comment that mosaic instruction is often cost prohibitive, especially for people in depressed economies.

I am very sensitive to that concern. I've been there. When I started out, I was using Yahoo groups to glean any information about best techniques and products for mosaic. My fellow budding mosaicists and I used the forums to share our experiences, successes and failures, while we stumbled along our learning curves in a world without YouTube or the Society of American Mosaic Artists. 

Back then, in order to get good, professional instruction in the medium, you had to fly to Italy and work with the masters in Ravenna and Spilimbergo. Eventually, some of those students became accomplished in the field and began offering classes internationally, but we had to travel to them and a weekend workshop generally cost $300 or more. Total costs generally ran about $1000 for any good mosaic workshop, and it was a major hardship for me. At the time, I was the mother of a young child, supported by a teacher, earning some sporadic income from my artwork and occasional part-time jobs that didn't cover the cost of childcare. 

This is at a Facilitating Community Mosaic workshop in Oakland, CA in 2011

In 2009, the SAMA (Society of American Mosaic Artists) conference took place near enough to my in-laws that we decided to make a family trip of it. I was so impacted by this experience, I swore to keep investing in my growth as a mosaic artist, and while I haven't managed to attend every year, I used credit cards to pay for my expenses, wrote it off at tax time, and the investment paid off. Eventually, I was skilled enough to actually carve out a career as a mosaic artist; which still amazes me every day. Now, I'm a SAMA instructor and I've been able to pay for most of my conference expenses by teaching.

These days, you can find some great videos online for free or cheap. A commenter pointed out that Domestika is hosting a workshop by one of my favorite mosaic artists, the fabulous Gary Drostle, out of the U.K. The course costs something like $12 U.S. and is a wealth of information. Domestika is a big company, and I'm not super familiar with how they operate, but they do have a huge global reach. They have found a price point that works, apparently, and it must have been worthwhile for Gary to contract with them and put in the time, even though he receives only a small royalty for each enrollment. But he'll have students all over the world, so it will add up. 

I work with Mosaic Arts Online and I have three courses available on the platform. MAO was created by Tami Macala, the owner of Santa Barbara Mosaic School. Tami left her work in television behind to focus on her mosaic business. She is a practicing mosaic artist who hosts in-person workshops, and she had the brilliant idea to create stream-able courses with visiting artists as well. She brought her television experience to the enterprise, and I was immediately impressed with her attention to details like camera angles, lighting, visual clarity, being concise, breaking down the course into clear segments with transitions that make sense, and then editing it all together for a seamless experience for the student. These days, MAO has become a vital resource, with the best instructors teaching specific styles and techniques, and Tami's spouse, Jerry, now edits everything together.

I can attest that each course takes weeks, if not months, of preparation from the instructor, along with coordination by Tami. We fly to Santa Barbara at our expense, and she arranges everything for us - even providing a car. We spend the better part of a week filming the process on multiple demos created ahead of time, and generally not in chronological order because actual mosaic work takes so much time. I fly down with projects at different stages so that I can show all of the steps in a few days. Jerry rearranges everything so that it appears to be completed like magic, and still make sense for the student following along.

Here I am in the MAO studio, filming a garden mosaic workshop. That monitor on the work table is brand new, and allows me to see what the student will see, so I can correct my hand position and keep the project in the center of the screen, etc.

The business is now incorporated, has an attorney for contractual help, has a social media coordinator and accountant, etc. They have to pay for hosting fees and equipment and a whole array of overhead costs. But remember, they are still a tiny operation; just a couple with some extra help. 

So, the prices we charge are compensatory with the effort and overhead. Each time I visit, there's a new piece of equipment that is a giant improvement, like a wireless mic, a tablet with a teleprompter, and a video camera with remote zoom instead of a digital camera on a tripod mounted to the ceiling. This is all a longwinded way to say that Tami has grown this business from scratch, and the courses are priced to help the business succeed. None of us are getting rich. But the platform has allowed me, and the other artists, to earn some passive income once our courses are live, and to reach students who can't afford to fly to our location and take a more expensive in-person workshop.

In the meantime, I have ventured into recording my own stream-able workshops and I currently have one listed on my website for $50. I priced it lower partly to make it affordable, and also because I am keenly aware that it is makeshift, using a camera on a mount in my messy studio and with very little editing (because I don't have that software or skill set) and no outline or script. You don't get to download pdfs and slideshows, and I often forget to say something important until too late. I'll be working on putting together another class soon, and I'm sure it will be better, but it's still going to be just me and my cell phone in my actual workspace; low tech, casual, and straightforward. I've gotten positive feedback on the first one, so I feel emboldened to try it again. 

I do these, not because I love filming myself, or to get attention - I hate both passionately. I'm doing it  because I like teaching, and because the extra income really helps keep my family solid between commissions. With the courses I'm creating from home, I'm happy to help out someone in another country for whom the price represents 3 months income, so if that's you, send me an email. 

And I do recommend checking out all of the amazing online resources that are now available to aspiring mosaic artists. Join facebook groups and find YouTube channels like https://www.youtube.com/channel/UCavAkUITnile1MQdv0cX5VA and https://www.youtube.com/c/LouAnnWeeks and https://www.youtube.com/c/TreasuryRoad. But if you really want to advance with your work, taking professional level workshops with practicing artists is invaluable. And they deserve to be paid for their time and for sharing their talent, which they have spent years (or decades) cultivating.

And have fun!

My courses on Mosaic Arts Online:

https://mosaicartsonline.com/p/garden-mosaic-for-any-climate-with-jennifer-kuhns

https://mosaicartsonline.com/p/professional-mosaic-installations-with-jennifer-kuhns

https://mosaicartsonline.com/p/precision-cutting-stained-glass-for-mosaic-with-jennifer-kuhns

https://mosaicartsonline.com/p/bundle-courses-garden-mosaic-and-precision-cutting-stained-glass-with-jennifer-kuhns

https://mosaicartsonline.com/p/bundle-courses-precision-cutting-in-stained-glass-and-professional-installations-with-jennifer-kuhns

Thursday, February 16, 2017

Mosaic Mural Making Workshop June 2017

I have just confirmed workshop dates for a Mosaic Mural Making Intensive at Arbutus Folk School in Olympia, WA.

Last November, a 4-day mosaic mural workshop was scheduled near Portland, OR, but due to unfortunate circumstances, the instructor's travel plans fell through.  With only a few days to go and with some students flying from other states to attend, the host called me in a panic.  I hadn't taught this workshop before, but I have a fair amount of experience with exterior installations and mosaic murals, so I agreed to step in.  And it was a great experience!  

Here are a few photos from the workshop:


With months to prepare, the next workshop will be even better.  This time, it will be in lovely Downtown Olympia, WA, where shopping, food, cafes, parks, the port and the farmers market are within walking distance.  The workshop will take place over 4 days, from Friday, June 23 to Monday the 26th.  It will be an action- and information- packed workshop, with the students working hands-on to create a mosaic that will be installed in the school.  Cost is $350 per person, all inclusive.  (Please bring glass and tile cutting tools if you have them, but I will supply a selection as well.)

For more information: www.arbutusfolkschool.org

Installing a mural in Atlanta, GA.

Installing a mural in Walnut Creek, CA.

Installing mosaic embellishments on a pediatric clinic in Olympia, WA.

Friday, March 20, 2015

Coming April 11 & 12: Beyond Basics Mosaic Workshop in Olympia, WA

Looking at the calendar, I just realized how quickly the next workshop is coming up!  This will be my first time teaching this class; "Beyond Basics," which will address some of the steps a beginner mosaic artist can take to get to the next level.  I've noticed that most mosaic workshops are either project based (make a mirror frame, a flower pot, a stepping stone) or are intermediate/advanced technique-based classes that go deeply into one specific method that the instructor has mastered.  I recently took a short version of Kelley Knickerbocker's "Fundamento" workshop, which was fantastic for taking andamento to new, mind-boggling dimensions.  And I just took a workshop in Philadelphia from Lynn Takata on building 3-D substrates for mosaic, which builds on one that I took from Passiflora Mosaics near Santa Barbara last spring, on building sculptures with a styrofoam base.  Each of these is very specific, and only useful if you have some experience under your belt to put it into context.

Over the past 5 years, I finally accepted that there are some mosaic fundamentals that will go a long way toward improving the composition and flow of a mosaic design.  Reluctantly, I wrapped my brain around these concepts, and after a few years, I realized how much my work had changed.  And I like it.  To emphasize and understand my growth, I re-made one of my favorite designs with new information.
I think this was 2009.  (Note: I had been working in mosaic for 9 years!)
This was 2014.
I still have much to learn, but I think this demonstrates a shift from beginner to intermediate, and I plan to break down the information I've gained as well as I can for this class.

There is so much a mosaic artist learns through trial and error, and from spending the time and money to take workshops from other experienced instructors, that I'll be covering the essentials in this 2-day class, but it won't be possible to convey my 15 years of experience within 10-12 hours.  I'm going to do my best, including an overview of the wide variety of applications, materials, substrates, adhesives and setting techniques used in mosaic art on Saturday.  On Sunday, I plan to get into some of the terminology specific to mosaic, and to delve into types and uses of andamento.  Students will have two small substrates of different kinds, with some materials samples and adhesives, and will be invited to play with each of these to get a sense of them.  You may choose to make a small project, or just use the time to gain information for future use.  Bring a notebook and pencil to take notes and sketch ideas.  When we get into andamento, this will be especially helpful.

I know I already have some absolute beginners signed up for the Olympia class, so I will try to start at that point, but I planned this originally for those crafters who have been playing around with mosaic, but would like some tools for taking their work to the next level.  I hope I can meet the needs of all participants, and I'll make every effort.

Details can be found at the Arbutus website: http://www.arbutusfolkschool.org/current-classes/
Scroll down to April  11/12.  Then on the upper left is a button for "register for classes."
I look forward to working with some of you!

Thursday, February 6, 2014

Mosaic Switchplate workshop coming to Auburn in March 2014

Last spring, my daughter's friend asked me if it would be possible to mosaic switchplates.  You know, the plastic covers that fit over light switches; usually that bland "cream" color, and purely functional.  I wondered why it had never occurred to me to decorate my own switchplates.

Well, for one, they are plastic, and plastic is not an ideal substrate for mosaic.  A mosaic artist would not normally work on a plastic surface.  However, switchplates are small and hard, so there isn't much flex in them.  I started experimenting with adhesives and designs, and began, one by one, covering all of my own switchplates in mosaic.

I made very simple designs:
By cutting glass pieces into random quadrangles, with a "fiesta" palette, I was able to make this quick and easy cover within an hour (not including grout.)

This switchplate is framed with ball chain and filled with various quadrangles in a simple pattern, which looks stylish and elegant.
I also tried making a picture on a switchplate:
This took a few hours and includes a fused glass bird and flower and leaf beads, as well as seed beads for the flower stems.  This would be very difficult for a beginner, and I would have to charge too much to sell them.
I eventually found a happy medium, creating patterns that are fairly simple for me to cut and assemble, yet result in a lovely, unique design:
I think this one is my favorite.  It is in a small bathroom painted bright blue, green, & teal.  The black and white patterned border sets it off, and small millefiori beads are cute accents.

My living room is in these colors, and this came out looking a bit art deco, which I love.  But the cuts and design are quite simple for someone with experience.

This is another simple pattern.  I sold this one at an art show and benefit.

Ball chain and beads, along with a striking color combination, make this switchplate extra pretty.  I sold this at a show.

I wanted to go with a monochromatic palette on this one, rather than bright colors.

I can't get the colors to render properly in this image, but it is another favorite.  It is dark red, opalescent teal, pale pink & purple, shimmering gold, and yellow-greens.
This is just a selection of the switchplates I've made, and I've learned a lot by trial and error in the process.  So, I'll be teaching my technique at a workshop in Auburn, WA on March 15th.  The workshop will cover how to prep the base, appropriate adhesives, creating pattern, introduction to cutting stained glass, and a grout demonstration.  I'll send students home with grout to finish their projects.  Tools are not included in the cost of the class.  Beginner students can get by with wheeled nippers (search online, or go to Home Depot's flooring department.)  But, to make custom shapes with glass, you'll need a glass scorer (toyo glass cutter is my choice), breaker-grozier pliers, and running pliers.  A full set of tools should cost about $45.  If you would prefer, order them from me up to 2 weeks prior to the class (to give me time to get them for you.)

The skills learned in the class will apply to most small mosaic projects, as well, so it is a great introduction to mosaic.  To register:  http://www.auburnwa.gov/things_to_do/arts_entertainment/art_classes.htm

Saturday, February 1, 2014

More good news for the Art Zone!

Last week, an article was published for the Society of American Mosaic Artists newsletter, Groutline, about my art program.  When I wrote it, it was still just getting started.  By the time it was released this past week, the program had grown (as chronicled in previous posts.)

Before I even opened my Groutline, I had a couple of emails asking how people could help.  And when I got to school yesterday, there were two boxes of donated materials waiting!  One was a very large box of glass tile from Patricia Bryant, and the other was a box of beads and ball chain ordered for us by Virginia Lucas.  When I brought out the boxes and explained to the students that people around the country are sending donations for the program, their jaws dropped.  I think the fact that there are people out there who care enough to contribute makes them feel valued, and more committed to the program.

I also had the pleasure of announcing that the students and I will show our work together at Hot Toddy as part of Olympia's Spring ArtsWalk festival.  And my husband will be entering some of their work into a school district art show.  They plan to create work for sale to raise funds for the Choice Cat Club.  We are going to start working on stepping stones and plant pots for spring.
We have a lot of clear and nearly clear glass, so many of the students add images under glass.  This is WA State with Bruce Lee (buried here).  Donnell has a stylized signature, which is the symbol on the left.  If you look closely, he also has a little Seattle skyline in the upper left.

I'm also working on organizing a field trip to tour the Spectrum Glass Factory and visit the Museum of Glass in Tacoma.  All of these things are very exciting.  The district is impressed with the level of participation in the program, and have found some funds for me to use.  I'll be using these for the field trip, to purchase some bright glass colors from a local glass company, and I have a district Home Depot card that I'm going to use today to buy grout, sponges, hanging hardware, a little broom, buckets, and all of those other little things we have been doing without.

It is so exciting and heartwarming to see my students getting this kind of support.  My position is funded by a grant through the McKinney-Vento Act, which serves home-insecure teens.  Many of the kids who participate qualify under the guidelines of the act, but it is open to everyone.  Most of the students at Choice High School are there because they don't fit in at a traditional school, and can be described as "at-risk youth."  They each have faced, and are facing, major obstacles.  This program goes a long way toward empowering and supporting these young people, and gives them new tools to cope with difficult situations.

Thanks, Everyone!

Saturday, January 18, 2014

New Workshop: Precision Glass Cutting for Mosaic

For years, I've offered beginner-level workshops, usually based on a simple project like suncatchers, garden mosaic, or pendants.  But I was recently asked if I would consider teaching a more advanced class for students interested in working with stained glass.  I hand-cut most of my glass, and I manage to get very clean lines and smooth curves.  I find this useful when stacking glass on edge, where I can't have shardes poking up:
In the center, clear glass is cut into undulating shapes, then stacked on edge to create hills and valleys.
...and it comes in handy when I want to add Opus Sectile to my andamento:
Opus Sectile is when each section of the image is cut as a solid piece, rather than using small pieces clustered together.
The ability to cut smooth shapes from glass without "nipping" allows me to create very clean lines with specific shapes when I want to.

And using a mix of different andamento styles within one mosaic can have an interesting effect:
The roses in this mosaic are done in Opus Sectile, as well as the lips, eyeballs, and the grey neckline.  The face and scarf are Opus Palladianum and the hair and background are done in Opus Vermiculatum.  For more info on andamento, see this website: http://www.mosaicmakers.co.uk/mosaicstyle.html

My new workshop in Precision Glass Cutting for Mosaic is designed for intermediate to advanced mosaic artists wishing to add sheet glass to their repertoire, or to gain more mastery over their cutting ability.  I'll demonstrate ways to cut curves and narrow shapes, and will bring my ring saw for students to try.  (The ring saw is vital for cutting more deeply into the glass.
Notice how some of the pistils extend into the shape of the adjacent petals.  The ring saw was necessary for cutting into the petals.  Delicate cutting technique was needed to make the narrow, curving pistils.
However, beginners are welcome to attend, and I will be going over the basics of glass cutting as well.  Students will create a small glass-on-glass project with an Opus Sectile design that includes curves.  I will provide some templates, or design your own.  Materials are provided, and I'll have some tools on hand, but I won't have enough for everyone, so I encourage you to bring your own toyo glass cutter, running pliers and breaker-grozier pliers.  Wheeled nippers are optional.  Email me if you need to purchase tools through me, or more information about that.

The first workshop is March 8th & 9th in Manzanita, OR.  The fee is $200.  Register with The Hoffman Center: http://hoffmanblog.org/about-us/contact-us

The second workshop will be May 17th & 18th at Sequoia Gallery in Hillsboro, OR (just outside of Portland.)  Registration info: http://sequoiagallerystudios.org/contact/

I am very excited to teach a more challenging class like this, and I look forward to seeing how my students use the information.  Contact me if you have any questions.

Tuesday, January 14, 2014

Broken Heart Mosaic Workshop in Olympia, WA

Many years ago, I offered one of my first mosaic workshops through a little shop called Whirligig in Downtown Olympia.  The owner promoted the class for me, and she titled it "Broken Heart Mosaic Workshop" because it was right before Valentine's Day and I was setting up a small heart-themed project for students.

I think I had four students, and all had broken hearts.  They spent the day creating heart mosaics from broken shards, pouring out their stories to each other, discussing relationships and processing loss and grief.  I didn't plan it that way.  It just happened, and it was great.

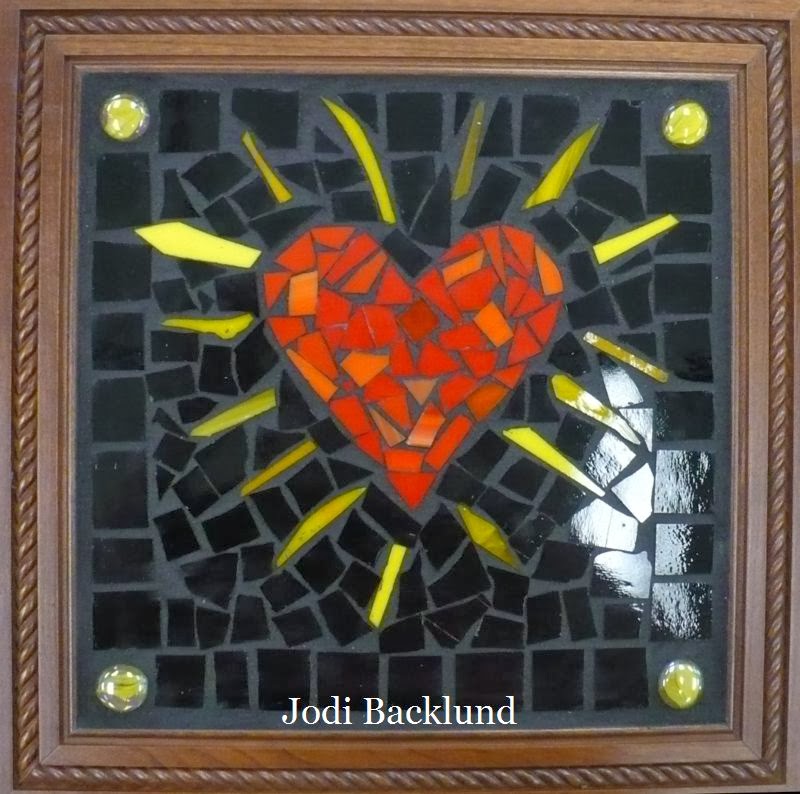
This is not student work.  I made it.
I was never particularly interested in the heart symbol.  It seemed too "cute" and girly to me.  But it was around that time that I started to change my relationship with the Heart.  As a symbol of love and hope, the heart shape may be something we need more of.  Laurel True created a mosaic heart that is particularly inspiring to me: http://truemosaics.com/love-and-truth

After that, I tried to teach the Broken Heart class each year, usually coinciding with Super Bowl Sunday.  Those classes filled up, and were always fun and intimate.  I had found a great stained glass studio that hosted my classes, Hexen Glass, but they closed their public studio a few years ago.  Since then, I haven't taught much, and not locally.  But I recently discovered a new folk art school in Olympia.  I like what they are doing, and I miss the Broken Heart workshop, so I'm finally offering it again this year.
This is a student project.  I love this one.

Here is the description on my website, with a link to registration information: http://jkmosaic.com/broken-heart-mosaic-workshop/

The class will be Sunday, Feb. 9th.  The project can be a gift for someone special or a keepsake for yourself.  I'm hoping for an enthusiastic response!

Friday, January 10, 2014

The Art Zone has taken on a life of it's own!

In a recent post, I wrote about my drop-in art program created to serve homeless and at-risk teens in a rural community.  The class takes place at an alternative high school where regular classes do not take place on Fridays.  Instead, one-on-one meetings take place between teachers and students, teachers do their planning, and students catch up on their studies.

I heard that the small group of seniors that had started coming to my class were staying after school this past week to work on their projects.  I was excited to hear it, but also nervous that they were doing project with no instruction or guidance.  Some had only done one small mosaic project, ever.  No one was telling them how to hold the toyo cutter correctly, how to space and place pieces, what andamento is, or how much glue to use.  My husband left work at 7pm on Wednesday and the group was still there, with a teacher's assistant available to lock up when they were done.  And on Thursday, one teacher was planning to work until 11pm, so the kids made arrangements to stay that late!  (It turned out they were working on their college applications as well, but still...)

So, I was pleased this morning to find a group of tired, but enthusiastic, students waiting for me with their projects already out.  The mural has some remarkably large pieces cut out for the sun's rays, which I would have recommended against, but it is in cured thinset now, and it looks fine.
The student on the left made a sugar skull mosaic, but she has been filling the negative space with paper collage.
I had seven participating students today, which is about as many as I can accommodate with the amount of tools available.  They had Pandora playing at a raucous volume.  Energy was high, there was singing and dancing and a lot of hilarious banter.  The kids talked about how good they feel when they are making mosaic, how they feel calm and happy.

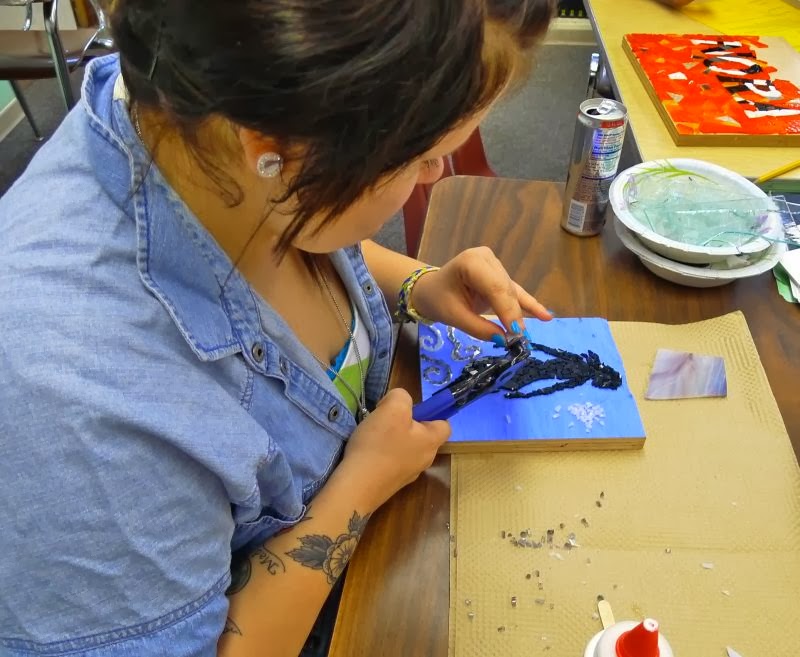
I give them basic instructions: how to use the tools, considerations about color and spacing, application of adhesive, etc.  From there, I let them do whatever they want.  My favorite thing about working with kids this age is that they are capable enough to use the tools safely and independently, yet they aren't restricted by ideas of what mosaic should be, or what they are "supposed" to do.  They try everything.  What if I glue glass onto glass?  What if I put clear glass over images?  Can I layer pieces of glass onto the top of my mosaic?  They think of things it took me years to discover, and they are making their mosaic for the fun of doing it.  Some of my adult students get so hung up on whether they are doing it "right" or what the outcome will be that they become paralyzed and can't glue their pieces down.  These teens just go for it.

This class started so slowly, and there were some weeks that only one person came, and one that nobody showed and I spent the day cleaning and organizing the art room.  I can't tell you how gratifying it is to see the room filled with music and laughter, and new students stopping in to see what's going on.  And they say, "I think I'll come next week.  This looks fun!" 

What a rewarding experience.  I'm so happy!

Monday, October 14, 2013

Learning new mosaic skills

This is the first post of my new, separate mosaic blog.  For years, I've kept a blog at cosmicbluemonkey.blogspot.com.  I started it as an online journal when our house was being built and became a chronicle of the process of homesteading in the country while raising a child and building a business as an artist.  But, sometimes I feel like the writing jumps back and forth between posts about beekeeping, gardening, and tending livestock to posts about art shows and mosaic learning experiences.  It makes sense to me, but I think creating a separate blog for art will give the writing more cohesion.

It has been a very slow year for my business, financially, but I've been busy with a wide variety of events.  I've given lectures and presentations, led group mosaic events, and participated in a number of exhibits.  I realized recently that this has really been a year of learning and growing as an artist.  While I intended to keep honing my particular style and technique, opportunities to learn new skills keep popping up, and I've been grabbing them by the horns.

In August, I spent four days in Hillsboro, OR with Lynn Adamo.  First, I attended her hammer & hardie workshop and learned to use a tool that had been sitting in my studio for a year.  The hammer & hardie is the original tool used to chop stone into small quadrangles for all of those ancient Roman and Turkish mosaic masterpieces.  It continues to be the tool of the masters in Italy.  After a captivating presentation by Rachel Saeger (rachelsagermosaics.com) at the mosaic summit in Lexington, KY, I ordered my own H&H, thinking I could teach myself to use it (though Rachel warned us in the lecture that it really requires hands-on instruction and lots of practice.)  And, I did find myself unable to break stone or tile with any consistency.

But, in two days of instruction on positioning and the correct inflection of the wrist, how to avoid muscle fatigue, and practice with just about every type of material, I was chopping stone and glass into little squarish shapes!  And I can't tell you how gratifying it is to open a piece of stone to find the surprises inside.  All of the tiny facets that emerge are so textural, organic, and interesting, and I am having fun piecing them into abstract designs that have a completely different look from anything else I've done.
During my stay with Lynn, I also helped to complete a large fish for her new installation in Astoria, using smalti.  Because the material is fairly expensive, I rarely work with smalti, a colorful handmade glass that is usually chopped into square chunks.  But I love the look of smalti and this chance to practice working with it, along with seeing the nuts and bolts of creating a large-scale mosaic that will be inlaid over a concrete pad, was very educational.  Lynn was meeting the challenges of creating the mosaic on mesh in sections that would ultimately fit together seamlessly, and I had the opportunity to be a witness as she brainstormed some of the glitches as they came up.  What a great experience to participate in a project like this without being the person responsible for the outcome!  All the fun with none of the stress.
That's me, working with Richard Davis.  Lynn Adamo took this photo and she has blogged about the whole project.
While chatting with Richard over smalti, the topic of pebble mosaic naturally came up.  I love the look and practical application of pebble mosaic, but I've been reluctant to add it to my repertoire because it is ONE MORE THING and I feel like I should be focusing more rather than less.  However, Richard offered to give me a basic overview of the process, and how could I pass that up?

So, last weekend, I headed to Whidbey Island and learned to make pebble mosaic.  The difficulties in making pebble mosaic include collecting stones, which is illegal in many places and expensive to buy them.  The other aspect is the weight of the slabs when they are made in forms, which is the method I learned.  The pebbles are placed in the base of the form, concrete is poured, and it is flipped over so that the pebbles become the surface.  Flipping and moving the finished mosaic requires a lot of strength.  
Here is the mosaic laid out in the form, before pouring concrete.  
Despite the foreseeable challenges involved in pebble mosaic, I'm very excited and grateful for this new information, and I can't wait to add to our garden walkways.  I started collecting stones from the creeks on our property yesterday.  All of it is black, and it's going to take many trips to the creek over many weeks to collect enough to get started, but I am undaunted.
The edge of my creek, full of smooth stones.
So, I find that this has been a year of acquiring new skills and honing the ones I had.  I expect winter to be an incubation period, as it almost always is, and I look forward to seeing what will emerge in the spring.